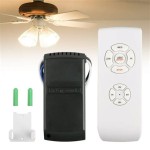
Understanding 3 Speed 4 Wire Ceiling Fan Switches
Ceiling fans are a common and convenient way to regulate temperature and air circulation within a room. They offer a cost-effective alternative to air conditioning, especially in warmer climates. One critical component of any ceiling fan system is the switch, which controls the fan's speed and other functions. 3-speed 4-wire ceiling fan switches are a standard type designed to provide a range of fan speeds and often include a light control. This article will delve into the workings of these switches, outlining their key features, wiring configurations, and troubleshooting tips for ensuring proper operation.
Understanding the Components
A 3-speed 4-wire ceiling fan switch consists of several key components that work together to control the fan's speed and light. These components include:
- Switch body: This is the main casing that houses the internal wiring and switches.
- Speed selector: A rotary switch or rocker switches that allow the user to select the desired fan speed (low, medium, high).
- Light switch: A separate switch for turning the fan's light fixture on and off.
- Terminals: These are the points where the wires connect to the switch. There are typically four terminals for the wires coming from the fan, and two terminals for the wires coming from the power source.
- Wires: The switch uses four wires: two power wires (hot and neutral), and two wires that control the fan speed.
The four wires from the ceiling fan are typically color-coded. The black wire is usually the "hot" wire, carrying power from the power source. The white wire is the "neutral" wire, returning power to the source. The blue wire is typically for the "low" speed, and the red wire for the "medium" speed. The "high" speed is often powered directly by the black (hot) wire. The switch uses these wires to control the flow of electricity to the fan motor, determining its speed.
Wiring Configuration
The wiring of a 3-speed 4-wire ceiling fan switch involves connecting the fan's wires to the switch terminals, and then connecting the switch terminals to the power source. The wiring diagram for a typical installation is as follows:
- The black wire from the power source is connected to the black wire terminal on the switch. This provides power to the switch.
- The white wire from the power source is connected to the white wire terminal on the switch. This provides neutral power to the switch.
- The black wire from the fan (high speed) is connected to the black wire terminal on the switch. This provides power to the "high" speed setting of the fan.
- The blue wire from the fan (low speed) is connected to the blue wire terminal on the switch. This provides power to the "low" speed setting of the fan.
- The red wire from the fan (medium speed) is connected to the red wire terminal on the switch. This provides power to the "medium" speed setting of the fan.
- The white wire from the fan is connected to the white wire terminal on the switch. This neutral wire allows the fan to operate properly.
The separate light switch is wired similarly, with the light's hot wire connecting to the light switch's terminal, and the light's neutral wire connecting to the neutral terminal on the switch box. This allows the light to be controlled independently of the fan speed.
Troubleshooting Common Issues
If a 3-speed 4-wire ceiling fan switch is not working properly, several issues could be at play. Here are some common problems and troubleshooting tips:
- No power to the switch: Check for a blown fuse or tripped circuit breaker in the electrical panel. Also, inspect the wiring for loose connections or broken wires.
- Fan not running: Check the fan motor for a faulty capacitor. Inspect the wiring for loose connections or broken wires. Verify the fan is correctly wired to the switch.
- Fan only runs at one speed: Check for loose connections or broken wires in the fan wiring or switch connections. Investigate whether the fan speed selector switch is functioning correctly.
- Light does not work: Verify the light bulb is properly installed and operational. Inspect the light switch and wiring for any loose connections or broken wires.
If the problem persists after checking these potential issues, it may be necessary to consult with a qualified electrician to diagnose and repair the problem. It is crucial to exercise caution when working with electrical wiring. Ensure the power is turned off at the circuit breaker before attempting any repairs or modifications.

Ceiling Fan Switch Kit Ze 208s E89885 3 Speed 4 Wire Pull Ch Mercadolivre

Zing Ear Ceiling Fan Switch Pull Chain 3 Speed 4 Wire 3a 6a

Correct Pull Switch Wiring Scheme For A 3 Speed Ceiling Fan And 4 Lead Capacitor Home Improvement Stack Exchange

Ceiling Fan Switch 3 Speed 4 Wire Ze 268s6 Zing Ear Wall Light Rotary Pull Chain Cord Control Replacement For

Hqrp 3 Speed 4 Wire Ceiling Fan Pull Chain Light Switch Pre Installed Wires Ebay

Ceiling Fan Switch Kit Ze 208s E89885 3 Speed 4 Wire Pull Chain Parts Control

Atron 3 Speed Ceiling Fan Switch With Pull Chain Plastic And Metal Multi Color 4 Wires 1 Per Pack

How To Wire 3 Speed Fan Switch

Uxcell Ceiling Fan Switch 3 Speed 4 Wire Ze208s E89885 Pull Chain Light Replacement Golden 1 Set

Zing Ear Ceiling Fan Switch Pull Chain 3 Speed 4 Wire 3a 6a


