Wiring Ceiling Fan With Remote
Installing a ceiling fan with a remote control can be a great way to add comfort and convenience to your home. Here are step-by-step instructions on how to wire a ceiling fan with a remote:
Step 1: Gather your materials
You will need the following materials:
- Ceiling fan
- Remote control
- Wire nuts
- Electrical tape
- Screwdriver
- Wire strippers
Step 2: Turn off the power
Before you begin working, turn off the power to the ceiling fan circuit at the breaker panel.
Step 3: Remove the old ceiling fan (if applicable)
If you are replacing an existing ceiling fan, remove it by following these steps:
- Remove the canopy by unscrewing the screws that hold it in place.
- Disconnect the wires from the ceiling fan by unscrewing the wire nuts.
- Remove the mounting bracket by unscrewing the screws that hold it in place.
- Lower the ceiling fan from the ceiling.
Step 4: Install the mounting bracket
Mount the new ceiling fan's mounting bracket to the electrical box in the ceiling. Make sure that the bracket is securely fastened.
Step 5: Wire the ceiling fan
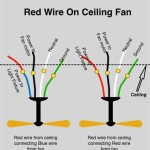
Connect the wires from the ceiling fan to the wires from the electrical box. Use wire nuts to secure the connections. Make sure that the wires are connected correctly. The black wire from the ceiling fan should be connected to the black wire from the electrical box. The white wire from the ceiling fan should be connected to the white wire from the electrical box. The green wire from the ceiling fan should be connected to the green or bare copper wire from the electrical box.
Step 6: Install the canopy
Place the canopy over the mounting bracket and secure it with screws.
Step 7: Install the ceiling fan
Lift the ceiling fan into place and attach it to the mounting bracket. Make sure that the ceiling fan is securely fastened.
Step 8: Install the remote control receiver
Mount the remote control receiver to the ceiling fan. Make sure that the receiver is securely fastened.
Step 9: Connect the remote control receiver to the ceiling fan
Connect the wires from the remote control receiver to the wires from the ceiling fan. Use wire nuts to secure the connections. Make sure that the wires are connected correctly.
Step 10: Install the remote control holder
Mount the remote control holder to the wall. Make sure that the holder is securely fastened.
Step 11: Install the batteries in the remote control
Install the batteries in the remote control. Make sure that the batteries are installed correctly.
Step 12: Test the ceiling fan and remote control
Turn on the power to the ceiling fan circuit at the breaker panel. Use the remote control to turn on the ceiling fan. Make sure that the ceiling fan is working properly.
Congratulations! You have now successfully installed a ceiling fan with a remote control.

How To Wire A Ceiling Fan Control Using Dimmer Switch With Remote Wiring
I Am Installing A Remote To Ceiling Fan Where Does The Red Wire Go Quora

How To Wire A Ceiling Fan Control Using Dimmer Switch

How To Install A Ceiling Fan Two Wall Switches What Bb Built

How To Install A Ceiling Fan With Remote Control Youtube

Ceiling Fan Remote With 2 Wires Doityourself Com Community Forums

How To Wire A Ceiling Fan Temecula Handyman

How To Wire A Ceiling Fan With Remote Receiver Youtube

Converting An Existing Ceiling Fan To A Remote Control

Issue With Ceiling Fan Transmitter And Remote Doityourself Com Community Forums


