How to Install a Ceiling Fan with Light
Installing a ceiling fan with light is a great way to improve the airflow and lighting in your home. While it may seem like a daunting task, it is actually quite simple with the right tools and know-how. This guide will provide you with step-by-step instructions on how to install a ceiling fan with light safely and correctly.
Safety First
Before you begin, it is important to take some safety precautions. Make sure that the electricity to the room where you will be working is turned off at the breaker box. Wear gloves and safety glasses to protect yourself from any potential hazards.
Gather Your Tools and Materials
To install a ceiling fan with light, you will need the following tools and materials:
- Ceiling fan with light kit
- Screwdriver
- Drill
- Electrical tape
- Wire nuts
- Ceiling fan mounting bracket
- Screws
- Ladder
Prepare the Electrical Box
Locate the electrical box in the ceiling where you want to install the ceiling fan. If there is not an existing electrical box, you will need to install one. Make sure that the electrical box is securely mounted and that the wires are properly connected.
Mount the Ceiling Fan Bracket
Attach the ceiling fan mounting bracket to the electrical box. Use the screws provided with the mounting bracket to secure it in place. Make sure that the mounting bracket is level and that it is securely fastened to the electrical box.
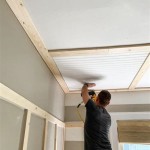
Hang the Ceiling Fan
Lift the ceiling fan up to the mounting bracket and align the holes in the fan with the holes in the bracket. Insert the screws provided with the ceiling fan and tighten them until the fan is securely attached to the bracket.
Connect the Electrical Wires
Connect the electrical wires from the ceiling fan to the wires in the electrical box. Match the colors of the wires and twist them together. Secure the connections with wire nuts and wrap them with electrical tape.
Install the Light Kit
If your ceiling fan came with a light kit, now is the time to install it. Follow the instructions provided with the light kit to attach the light fixture to the ceiling fan.
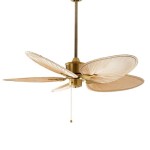
Hang the Blades
Attach the ceiling fan blades to the fan motor. Make sure that the blades are securely fastened and that they are balanced. Use a level to ensure that the blades are hanging evenly.
Turn on the Power
Turn on the power at the breaker box and test the ceiling fan. Make sure that the fan is running smoothly and that the light is working properly.
Enjoy Your New Ceiling Fan
Congratulations! You have now successfully installed your ceiling fan with light. Enjoy the improved airflow and lighting in your home.

Replacing A Ceiling Fan Light With Regular Fixture Jlc Online

Wiring A Ceiling Fan And Light With Diagrams Ptr

Replacing A Ceiling Fan Light With Regular Fixture Jlc Online

Wiring A Ceiling Fan And Light With Diagrams Installation

How To Wire A Ceiling Fan Light Switch Quora

Ceiling Fan Wiring Diagram Diy Electrical Basic

How To Install A Ceiling Fan Light Kit Youtube

How To Wire A Ceiling Fan Control Using Dimmer Switch

How To Install A Ceiling Fan Hgtv Youtube

How To Wire A Ceiling Fan Control Using Dimmer Switch