How To Install A Ceiling Fan And Light
A ceiling fan and light can be a great way to improve the comfort and style of your home. They can help to circulate air, keeping you cool in the summer and warm in the winter. They can also provide additional lighting, making it easier to see what you're doing. If you're handy with tools, you can install a ceiling fan and light yourself. Here's how to do it:
Choose the right fan and light
The first step is to choose the right fan and light for your needs. Consider the size of the room, the height of the ceiling, and the style of your décor. You'll also need to decide whether you want a fan with a light kit or a separate light fixture.
Gather your tools and materials
Once you've chosen your fan and light, you'll need to gather the following tools and materials:
- Phillips screwdriver
- Flathead screwdriver
- Wire strippers
- Electrical tape
- Ceiling fan mounting bracket
- Ceiling fan canopy
- Ceiling fan blades
- Light kit (if desired)
- Light bulbs
- Safety glasses
Turn off the power
Before you begin, it's important to turn off the power to the room where you'll be installing the fan and light. You can do this by flipping the circuit breaker or removing the fuse for the room.
Install the mounting bracket
The first step is to install the ceiling fan mounting bracket. The bracket will be attached to the electrical box in the ceiling. Use the screws provided with the bracket to secure it to the box.
Attach the canopy to the bracket
Next, attach the canopy to the mounting bracket. The canopy is the decorative cover that will hide the mounting bracket and the electrical wires.
Connect the wires
Now it's time to connect the wires. The wires from the fan will need to be connected to the wires from the electrical box. Make sure to match the colors of the wires. Use wire strippers to remove about 1/2 inch of insulation from the ends of the wires. Then, twist the exposed wires together and secure them with electrical tape.
Install the blades
Once the wires are connected, you can install the blades. The blades will be attached to the motor housing on the fan. Use the screws provided with the fan to secure the blades.
Install the light kit (if desired)
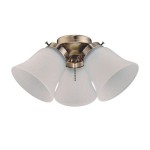
If you're installing a fan with a light kit, you'll need to install the light kit now. The light kit will be attached to the bottom of the fan. Use the screws provided with the light kit to secure it to the fan.
Install the light bulbs
Finally, install the light bulbs. The light bulbs will be screwed into the sockets on the light kit.
Turn on the power
Once everything is installed, you can turn on the power to the room. Test the fan and light to make sure they're working properly.
Enjoy your new ceiling fan and light!
Congratulations! You've now successfully installed a ceiling fan and light. Enjoy the improved comfort and style that it brings to your home.

Wiring A Ceiling Fan And Light With Diagrams Ptr

Wiring A Ceiling Fan And Light With Diagrams Ptr

Wiring A Ceiling Fan And Light With Diagrams Ptr

Replacing A Ceiling Fan Light With Regular Fixture Jlc Online

Wiring A Ceiling Fan And Light With Diagrams Ptr
Replacing A Ceiling Fan Light With Regular Fixture Jlc Online

Wiring A Ceiling Fan And Light With Diagrams Ptr

4 Ways To Replace A Light Bulb In Ceiling Fan Wikihow

Wiring A Ceiling Fan And Light With Diagrams Ptr

4 Ways To Replace A Light Bulb In Ceiling Fan Wikihow
See Also

