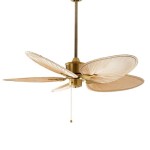
Installing a Ceiling Fan Without Existing Wiring
Integrating a ceiling fan into your home can significantly enhance comfort and energy efficiency. While most installations involve connecting to pre-existing electrical wiring, there are scenarios where you may need to install a ceiling fan without existing wiring. This process requires careful planning, proper tools, and adherence to safety guidelines. Here's a comprehensive guide outlining the steps involved in installing a ceiling fan in a location devoid of pre-existing electrical wiring.
1. Assessing the Situation and Planning
Before embarking on the installation process, a thorough assessment of the situation is crucial. This involves identifying the optimal location for the ceiling fan and determining the necessary electrical components and materials.
Location Selection:
Choose a location that aligns with the intended purpose of the ceiling fan. Consider factors such as proximity to a wall switch, available ceiling space, and the desired airflow direction. Ensure the selected location is free of obstructions, including structural beams or pipes.
Electrical Requirements:
Since there is no existing wiring, you will need to run new electrical wiring from a power source. Consult with a qualified electrician to determine the appropriate gauge of wire, breaker size, and necessary electrical components, such as a junction box and a ceiling fan switch. They can also help determine the best route for the wiring, whether it's through the attic, crawlspace, or walls.
Material Procurement:
Once the electrical requirements are established, gather the necessary materials. These include: * Ceiling fan and accompanying hardware * Electrical wire (appropriate gauge and length) * Junction box (suitable for the ceiling fan) * Wall switch (dedicated to the fan) * Electrical tape * Wire strippers * Screwdriver set (including Phillips head) * Level * Stud finder2. Running Electrical Wiring
Running new electrical wiring is the most complex aspect of this installation. Since there's no existing wiring, you'll need to run the wire from a power source to the location of the ceiling fan. This process may require some knowledge of basic electrical work, and it's strongly recommended to consult with a qualified electrician for this step.
Determining the Power Source:
Locate the nearest power source, which could be a circuit breaker panel or an existing electrical outlet.
Wiring Route:
The wiring route should be carefully planned to ensure proper access to the power source and the ceiling fan location. Consider running the wiring through the attic, crawlspace, or wall cavities, depending on the structure of your home.
Running the Wire:
*Cutting the Wire:
Using the wire strippers, cut the wire to the appropriate length to reach the ceiling fan location from the power source. *Fishing the Wire:
If running the wire through wall cavities, you may need to use a fish tape to pull the wire through. Fish tape is a flexible, spring-steel tape that is threaded through the cavity and then used to pull the wire through. *Securing the Wire:
Once the wire is in place, it should be secured at regular intervals using staples or wire clips to prevent it from becoming loose or damaged. *Connecting the Wire:
Connect the electrical wire to the power source and then connect the other end of the wire to the dedicated junction box for the ceiling fan.3. Installing the Ceiling Fan and Junction Box
The final steps involve installing the ceiling fan and the junction box.
Installing the Junction Box:
The junction box serves as the central point for connecting the electrical wiring to the ceiling fan. *Attaching the Junction Box:
The junction box should be attached to the ceiling using screws or nails, ensuring it's securely fastened. *Connecting the Wires:
Connect the wires from the junction box to the ceiling fan according to the manufacturer's instructions.
Installing the Ceiling Fan:
*Mounting the Fan Bracket:
The ceiling fan bracket should be mounted to the junction box with screws. Ensure the bracket is level using a level tool. *Attaching the Fan:
The ceiling fan should be attached to the bracket. Again, follow the manufacturer's instructions for proper installation. *Connecting the Fan:
After the ceiling fan is secured, connect the fan blades.
Testing:
Once the ceiling fan is installed, turn on the power. Test the fan by operating the switch to ensure it rotates smoothly and all functions are working correctly.
Important Notes:
*Safety Precautions:
Always disconnect power to the circuit before working on any electrical wiring. *Professional Assistance:
If you're unsure about any part of the installation process, consult with a qualified electrician. *Building Codes:
Ensure that your installation adheres to local building codes and regulations.
How To Install A Ceiling Fan Where No Fixture Exists 8 Step Guide Home Inspector Secrets

How To Install A Ceiling Light Fixture Without Existing Wiring Lights Fixtures Diy Electrical

Installing A Ceiling Fan Without Existing Wiring Electricians Talklocal Blog Talk Local

Installing A Ceiling Fan Without Existing Wiring Mr Electric

How To Install A Ceiling Fan In Location Without Existing Power Hunker Installation Wiring

How To Install A Ceiling Fan Without Having Cut Into The Electrical Box No Attic Access Quora

How To Install A Ceiling Fan Where No Fixture Exists 8 Step Guide Home Inspector Secrets

How To Install A Ceiling Fan Without Existing Wiring

How To Install A Ceiling Fan Without Existing Wiring 8 Steps

Replacing A Ceiling Fan Light With Regular Fixture Jlc Online
See Also