How To Sheetrock A Basement Ceiling: A Comprehensive Guide
Finishing a basement can significantly increase a home’s livable space and overall value. One of the most common and effective ways to improve the aesthetics and functionality of a basement is by installing a sheetrock, or drywall, ceiling. This process, while requiring some physical effort and attention to detail, is achievable for many homeowners with basic construction skills. This article will provide a comprehensive guide on how to sheetrock a basement ceiling, covering preparation, installation, and finishing techniques.
Before embarking on this project, proper planning and preparation are paramount. This involves assessing the existing ceiling framework, gathering the necessary tools and materials, and ensuring the space is safe and ready for the task. Neglecting these preliminary steps can lead to avoidable complications and a less-than-desirable final result.
I. Preparation and Planning
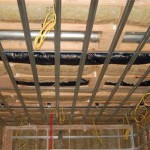
The initial step involves a thorough inspection of the existing ceiling structure. This includes identifying and addressing any potential issues such as sagging joists, uneven surfaces, or exposed wiring and plumbing. Correction of these problems is crucial to ensure a stable and aesthetically pleasing finished ceiling. Any necessary repairs or adjustments should be completed before proceeding with the sheetrock installation.
Furthermore, careful consideration must be given to the layout of the basement ceiling. This involves determining the optimal sheetrock orientation and the placement of seams. A well-planned layout minimizes waste, facilitates easier installation, and contributes to a more visually appealing finished product. It's advisable to sketch out a detailed plan before beginning the actual installation process.
Accurate measurements are essential for ordering the correct amount of materials. Measure the length and width of the ceiling area and calculate the total square footage. Account for waste when ordering sheetrock, typically adding an extra 10-15% to the total square footage. This ensures sufficient material even if mistakes occur during cutting or installation.
Safety is also a critical aspect of the preparation phase. Wear appropriate personal protective equipment (PPE), including safety glasses, a dust mask, and work gloves. Ensure adequate ventilation to minimize the inhalation of dust and fumes. If working at heights, use a sturdy ladder or scaffolding and follow all safety guidelines.
Gather all the necessary tools and materials before starting the project. This includes:
*Sheetrock (drywall)
*Drywall screws
*Drywall joint compound (mud)
*Drywall tape (paper or mesh)
*Primer
*Paint
*Utility knife
*Drywall saw
*Drywall screw gun
*Taping knives (various sizes)
*Mud pan
*Sanding sponge or sandpaper
*Dust mask
*Safety glasses
*Work gloves
*Ladder or scaffolding
*Measuring tape
*Chalk line
*Stud finder (optional)
*Drywall lift (optional, but highly recommended)
A drywall lift, while optional, greatly simplifies the process of lifting and positioning the sheetrock panels, especially for larger basements or single-person installations. The use of a drywall lift can significantly reduce the physical strain associated with the project and improve the speed and accuracy of the installation.
II. Sheetrock Installation
The installation process begins with carefully lifting and positioning the first sheetrock panel against the ceiling joists. If using a drywall lift, ensure it is properly positioned to support the weight of the panel. If lifting manually, enlist the help of one or more assistants to avoid straining or dropping the sheetrock.
Secure the sheetrock to the ceiling joists using drywall screws. Drive the screws straight in, countersinking them slightly without tearing the paper facing of the sheetrock. Position the screws approximately 12 inches apart along the joists, and 6-8 inches apart along the edges. Consistent screw spacing ensures a secure and even attachment.
When installing subsequent panels, ensure that the seams are staggered to minimize cracking and improve the structural integrity of the ceiling. Staggering the seams prevents long, continuous lines of weakness that can be prone to stress and movement. A staggered pattern distributes the load more evenly across the ceiling structure.
Cutting sheetrock to size requires precision and attention to detail. Measure the required dimensions accurately and use a utility knife to score the paper facing along the cutting line. Snap the sheetrock along the score line and then cut through the paper backing. For more complex cuts, such as around pipes or electrical boxes, use a drywall saw.
When installing sheetrock around pipes or electrical boxes, cut the holes slightly larger than the diameter of the object to allow for expansion and contraction. This prevents the sheetrock from binding against the object and potentially cracking over time. Use a keyhole saw or a specialized circle cutter for creating clean and accurate holes.
Pay particular attention to the corners of the ceiling. Inside corners should be fitted snugly and securely, while outside corners should be reinforced with metal corner bead. The corner bead provides a durable and protective edge that prevents chipping and damage.
After installing all the sheetrock panels, inspect the ceiling for any gaps or imperfections. Fill any gaps with joint compound and allow it to dry completely. Address any protruding screws or uneven surfaces before proceeding to the taping and mudding stage.
III. Taping, Mudding, and Finishing
The taping and mudding process is crucial for creating a smooth and seamless ceiling surface. Apply drywall tape along all seams and inside corners using joint compound. Embed the tape firmly into the mud, removing any excess compound and ensuring a smooth, even surface.
Apply multiple coats of joint compound, allowing each coat to dry completely before applying the next. Feather the edges of each coat to blend seamlessly with the surrounding surface. Use progressively wider taping knives for each subsequent coat to achieve a smooth and even finish.
Sanding is an essential step in achieving a professional-looking finish. Use a sanding sponge or sandpaper to smooth out any imperfections and blend the mudded areas with the surrounding sheetrock. Be careful not to over-sand, as this can damage the paper facing of the sheetrock.
After sanding, remove all dust and debris from the ceiling surface. Wipe the ceiling down with a damp cloth to ensure a clean and dust-free surface for priming and painting. A clean surface allows the primer and paint to adhere properly, resulting in a more durable and attractive finish.
Apply a coat of drywall primer to the entire ceiling surface. Primer helps to seal the sheetrock and provides a uniform surface for the paint to adhere to. Choose a primer that is specifically designed for drywall and follow the manufacturer's instructions for application.
Finally, apply two coats of paint to the ceiling, allowing each coat to dry completely before applying the next. Choose a paint that is specifically designed for ceilings and has a matte or flat finish to minimize glare and hide imperfections. A well-chosen paint can enhance the aesthetic appeal of the finished ceiling and contribute to a brighter and more inviting basement space.
Inspect the finished ceiling for any remaining imperfections. Touch up any areas as needed with joint compound, sanding, and paint. A thorough inspection ensures a high-quality and visually appealing finished product.
Proper ventilation is important throughout the entire process, especially during sanding and painting. Open windows and doors or use fans to circulate air and minimize the inhalation of dust and fumes. Adequate ventilation contributes to a healthier and safer working environment.
The successful installation of a sheetrock basement ceiling requires careful planning, attention to detail, and adherence to proper techniques. By following these guidelines, homeowners can achieve a professional-looking finish and transform their basement into a more comfortable and valuable living space. Remember to prioritize safety and take your time to ensure a quality outcome.

Basement Ceilings Drywall Or A Drop Ceiling Fine Homebuilding

How To Drywall A Basement Ceiling Toronto Painters

How To Hang Drywall On Basement Ceilings Best Sheetrock Installing Method Apartment 10of14 Youtube

Is Drywall Ceiling In A Basement Any Good Remodeling Journey

Basement Remodel Day 4 Hanging Taping Mudding Drywall

Basement Ceilings Drywall Or A Drop Ceiling Fine Homebuilding

Basement Beautification Perfecting Drywall In Renovation Projects

How To Drywall A Basement Ceiling

A Drop Ceiling That Looks Better Than Drywall How To Install In Basement Diy Youtube

Drop Ceilings Birmingham Al Drywall Or Basement Ceiling Which Is Best
See Also


