Ceiling Fan Blade Arms Replacement
Ceiling fans are indispensable home fixtures, providing comfort and style. However, as time passes, their blade arms may deteriorate or become damaged. Replacing these arms is a relatively simple DIY project that can restore your fan's functionality and aesthetics.
Tools and Materials Required
- New ceiling fan blade arms
- Screwdriver (Phillips or flathead, depending on fan model)
- Ladder
- Electrical tape
Safety Precautions
Before starting any electrical work, always turn off the power at the circuit breaker.
Step-by-Step Instructions
1. Remove the Blades:Using a screwdriver, loosen the screws that hold the blades to the blade arms. Carefully remove the blades and set them aside.
2. Remove the Arms:Locate the screws that secure the blade arms to the fan motor. Depending on the fan model, these screws may be hidden by a canopy or cap. Remove these screws to detach the blade arms.
3. Install the New Arms:Align the new blade arms with the corresponding slots on the motor. Secure them with the screws, tightening them securely.
4. Reattach the Blades:Position the blades on the blade arms and tighten the screws to secure them. Ensure that the blades are balanced and facing the correct direction for optimal airflow.
5. Secure the Canopy or Cap:If the fan has a canopy or cap, reinstall it over the blade arms, ensuring it is securely fastened.
6. Restore Power:Return to the circuit breaker and turn the power back on. Test the fan to ensure proper operation.
Tips for Choosing New Blade Arms
When selecting new blade arms, consider the following factors:
- Fan Model: Ensure the arms are compatible with your specific fan model.
- Length: The length of the arms will affect the diameter of the fan and the amount of airflow it generates.
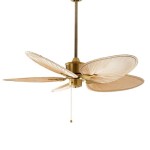
- Material: Common materials include metal, plastic, and wood. Choose a material that complements the style and decor of your home.
- Finish: Arms are available in a variety of finishes, such as brushed nickel, oil-rubbed bronze, and white. Select a finish that matches the existing hardware in your home.
Additional Tips
For optimal safety and performance:
- Ensure that all screws are securely tightened.
- Wrap electrical tape around any exposed wires for added insulation.
- Regularly clean and maintain your ceiling fan to extend its lifespan.
Conclusion
Replacing ceiling fan blade arms is a straightforward and budget-friendly way to refresh the look and functionality of your home. By following these instructions and tips, you can enjoy the comfort and style of a well-maintained ceiling fan for years to come.

Commercial Electric Brushed Nickel Replacement Ceiling Fan Blade Arms For 52 In Fans 813422 The Home

52 Replacement Blade Arm Repair Parts Dan S Fan City Ceiling Fans Accessories
Fan Blade Arm Replacement Ifixit Repair Guide

Harbor Breeze Universal 52 In Broe Reversible Ceiling Fan Blade Arm Fba4 At Lowes Com

Westinghouse 52 Inch Replacement Fan Blade Arms White Finish

Westinghouse

Commercial Electric Brushed Nickel Replacement Ceiling Fan Blade Arms For 52 In Fans 813422 The Home

Ceiling Fan Blade Arm Replacement Polished Brass 1 Pc 23 Ebay

42 Replacement Ceiling Fan Blades Arms Blade Brackets Fork For Arm 5pc Imitation Gold Walmart Com
Harbor Breeze 5 Pack White Ceiling Fan Blade Arms In Dominican Republic At Dop 4291 Rating

