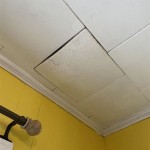
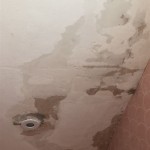
Drywall Repair Ceiling Water Damage
Repairing ceiling water damage can be a time-consuming and costly project, but it's important to address water damage quickly to prevent further damage to your home. Drywall, a common material used in ceilings, is particularly vulnerable to water damage and can deteriorate quickly if not repaired promptly.
The extent of the damage will determine the repair approach. Minor water damage, such as a small leak, may only require patching or replacing a small section of drywall. However, more extensive damage may necessitate removing and replacing a larger area of drywall.
Tools and Materials You'll Need:
- Drywall saw or utility knife
- Drywall patch kit or new drywall
- Joint compound
- Putty knife
- Sandpaper
- Primer and paint (if necessary)
Step-by-Step Instructions:
1. Assess the Damage: Determine the extent of the water damage and locate the source of the leak. If necessary, contact a plumber to repair the leak before proceeding with drywall repairs.
2. Remove Damaged Drywall: Use a drywall saw or utility knife to carefully cut out the damaged section of drywall. Be sure to cut along the studs or joists to avoid further damage. Remove the damaged drywall and discard it.
3. Replace or Patch Drywall: For minor damage, you can use a drywall patch kit. Clean the edges of the hole and apply the patch according to the manufacturer's instructions. For larger areas of damage, cut a new piece of drywall to fit the hole and secure it to the studs or joists using drywall screws.
4. Apply Joint Compound: Use a putty knife to apply a thin layer of joint compound over the patched or replaced area. Smooth out the compound and let it dry completely.
5. Sand and Paint: Once the joint compound is dry, sand it smooth using fine-grit sandpaper. Apply a coat of primer to the repaired area and let it dry. Finally, paint the repaired area to match the surrounding ceiling.
Tips for Successful Drywall Repair:
- Always wear safety glasses and gloves when working with drywall.
- Use a sharp utility knife or drywall saw to create clean, straight cuts.
- Apply joint compound in thin layers and allow each layer to dry completely before applying the next.
- Sand the repaired area thoroughly to create a smooth surface.
- Use a primer to seal the repaired area and prevent paint from peeling.
By following these steps and tips, you can effectively repair ceiling water damage and restore your drywall to its original condition. Regular maintenance and prompt repairs can help prevent water damage and extend the life of your ceiling.

Diy Water Damaged Drywall Ceiling Repair Easy Step By Guide Youtube

How To Repair Water Damage Walls Ceilings True Value Hardware

How To Repair Water Damaged Drywall Ceiling Youtube

How To Repair Water Damaged Drywall Ceiling Step By

How To Repair Water Damaged Drywall A Step By Guide Painters Serving Napolis

How To Repair Water Damaged Drywall Ceiling

What To Do If Your Ceiling Has Water Damage

How To Determine Drywall Water Damage Jenkins Restorations

The Steps To Repair Drywall Ceiling Water Damage

How To Drywall Repair A Water Damage Ceiling Tutorial Youtube


