How to Do Textured Ceilings
Textured ceilings offer a way to add visual interest and disguise imperfections in drywall. Several methods exist for applying texture, ranging from simple DIY techniques to more complex approaches requiring specialized equipment. This article outlines some common texturing methods and the necessary steps for successful application.
Preparation is Key: Before beginning any texturing project, proper preparation is crucial. Furniture should be removed from the room or thoroughly covered with drop cloths. Walls should be masked with painter's tape and plastic sheeting to prevent overspray. The ceiling itself needs to be clean and free of dust, cobwebs, and peeling paint. Any existing cracks or holes should be patched and sanded smooth. A primer coat may be necessary to ensure proper adhesion of the texture material.
Choosing a Texturing Method: The desired texture determines the appropriate application method. Some common methods include:
Skip Trowel: This technique creates a random, slightly raised texture. Joint compound or specifically designed "skip trowel" texture material is applied to the ceiling with a trowel, then lightly skimmed over with the edge of the trowel at an angle, "skipping" across the surface and leaving a textured pattern. This method requires practice to achieve consistent results.
Knockdown: This method offers a more subtle, flattened texture. Joint compound is applied to the ceiling with a roller or sprayer, creating peaks and valleys. After the compound has partially dried, a wide knockdown knife is used to flatten the peaks, resulting in a softer, more uniform texture.
Orange Peel: This widely used technique produces a finely textured surface resembling the skin of an orange. A specialized hopper gun connected to an air compressor sprays a thinned mixture of joint compound onto the ceiling. Adjusting the air pressure and nozzle size controls the texture's coarseness.
Popcorn: This heavily textured application uses polystyrene beads mixed with joint compound. The mixture is sprayed onto the ceiling with a hopper gun, creating a thick, bumpy texture. While popular in the past, popcorn ceilings can be challenging to repair and paint, and may contain asbestos in older homes, requiring professional removal.
Applying the Texture: Regardless of the chosen method, consistent application is essential. Work in manageable sections, overlapping slightly to avoid noticeable seams. Maintain a consistent pressure and angle with tools like trowels and knives. With spray applications, ensure consistent air pressure and distance from the ceiling for an even texture.
Necessary Tools and Materials: The specific tools required depend on the chosen texturing method. Common tools include:
- Drop cloths and painter's tape
- Joint compound or texture material
- Trowels (various sizes for different techniques)
- Knockdown knife (for knockdown texture)
- Hopper gun and air compressor (for orange peel and popcorn textures)
- Sprayer (optional, for applying knockdown texture)
- Sandpaper (for smoothing patched areas)
- Primer
- Paint (optional, for finishing)
Safety Precautions: Proper safety precautions are essential when working with texturing materials. Always wear eye protection to prevent eye irritation from dust and debris. A dust mask or respirator should be worn, especially when sanding or working with sprayed materials. Adequate ventilation is crucial to minimize exposure to airborne particles.
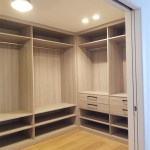
Practice and Patience: Achieving professional-looking textured ceilings often requires practice. Experimenting on a small, less visible area, such as a closet ceiling, can help develop technique and determine the desired texture. Patience is essential, especially with more complex methods like skip trowel. Taking breaks and allowing adequate drying time between coats is crucial for optimal results.
Cleaning Up: Proper cleanup is essential after completing the texturing process. Tools should be cleaned immediately with water to prevent the compound from hardening. Dispose of used materials according to local regulations. Remove painter's tape carefully to avoid damaging freshly painted walls. Thoroughly vacuum or sweep the area to remove dust and debris.
Considering Professional Assistance: While some texturing methods are suitable for DIY projects, more complex techniques or large areas may benefit from professional assistance. Experienced contractors possess the expertise and equipment to achieve high-quality results efficiently and safely. They can also advise on the best texturing method for a specific space and provide accurate cost estimates.

Easiest Ceiling Texture For Beginners Youtube

How To Texture A Ceiling 3 Easy Ways For Beginners

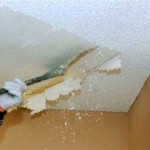
How To Repair Textured Ceilings Craving Some Creativity

Best And Fastest Way To Texture A Ceiling

How Do You Make Ceiling Paint Grittily Textured

The Top 15 Ceiling Texture Types For Easy Selection

How To Texture Or Retexture Ceilings Danks And Honey

How To Skim Textured Ceilings Flat Orange Peel

How To Popcorn Your Ceiling 15 Steps With S Wikihow

How To Texture Walls Yourself Drywall Diy Tools Tips