How To Fix Nail Pops In Ceiling
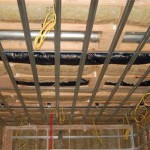
Nail pops are a common problem that can occur in ceilings, especially in older homes. They are caused by the nails that were used to secure the drywall to the ceiling joists working their way out over time. This can be caused by a number of factors, including:
- Shrinkage of the wood framing
- Movement of the ceiling joists
- Changes in temperature and humidity
- Improper installation of the drywall
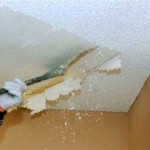
Nail pops can be unsightly and can also lead to other problems, such as cracks in the drywall. If you have nail pops in your ceiling, it is important to fix them as soon as possible to prevent further damage.
There are a few different ways to fix nail pops in the ceiling. The best method will depend on the severity of the problem. If the nail pops are small and there are only a few of them, you may be able to fix them yourself with a simple hammer and nail. However, if the nail pops are large or there are many of them, it is best to call a professional to fix the problem.
Here are the steps on how to fix nail pops in the ceiling:
1. Identify the Nail Pops
The first step is to identify the nail pops in the ceiling. You can do this by running your hand over the ceiling and feeling for any bumps or protrusions. Once you have identified the nail pops, mark them with a pencil.
2. Remove the Nails
Once you have marked the nail pops, you need to remove the nails. You can do this with a hammer and nail puller. Be careful not to damage the drywall when you are removing the nails.
3. Countersink the Holes
Once the nails have been removed, you need to countersink the holes. This will help to hide the holes and prevent them from becoming visible again. To countersink the holes, you can use a countersink bit and a drill. Drill the holes until they are slightly wider than the head of the nail.
4. Fill the Holes
Once the holes have been countersunk, you need to fill them. You can do this with a spackling paste or a joint compound. Apply the spackling paste or joint compound to the holes and smooth it out with a putty knife. Allow the spackling paste or joint compound to dry completely.
5. Sand the Holes
Once the spackling paste or joint compound has dried, you need to sand the holes. This will help to smooth out the surface and make the holes less noticeable. Sand the holes until they are flush with the rest of the ceiling.
6. Paint the Ceiling
Once the holes have been sanded, you need to paint the ceiling. This will help to hide the holes and make the ceiling look new again. Apply two coats of paint to the ceiling, allowing each coat to dry completely before applying the next.
By following these steps, you can fix nail pops in the ceiling and make your ceiling look new again.

The Best Way To Fix Screw Pops In Drywall

How To Fix Screw Nail Pops Wall Or Ceiling Youtube

How To Fix Nail Pops Youtube

Fix Your Ceiling Nail Pops Fast And Easy

The Best Way To Fix Screw Pops In Drywall Youtube

How To Fix Plasterboard Drywall Screw Pops Youtube

How To Repair Nail Pops And Drywall Cracks Nonprofit Home Inspections

Nail Pops In Drywall Lopco Contracting Ri

How To Fix Nail Pops In Drywall 7 Steps Like A Pro Tribble Painting

How To Fix Screw Nail Pops Wall Or Ceiling Youtube