How To Install A Ceiling Flush Mount Lighting Fixture
A flush mount lighting fixture is a type of light fixture that is mounted directly to the ceiling. It is a popular choice for many rooms in the home, as it provides a clean, modern look. Flush mount lighting fixtures are also relatively easy to install, making them a good option for do-it-yourselfers.
To install a ceiling flush mount lighting fixture, you will need the following tools and materials:
- A Phillips head screwdriver
- A flat head screwdriver
- A wire cutter
- A wire stripper
- Electrical tape
- A ladder
- Safety glasses
Before you begin, turn off the power to the circuit that you will be working on. This can be done by flipping the breaker or removing the fuse that corresponds to the circuit.
Once the power is off, you can begin the installation process.
- Remove the old light fixture. If there is an existing light fixture, you will need to remove it before you can install the new one. To do this, first remove the screws that hold the fixture to the ceiling. Then, carefully disconnect the wires that are connected to the fixture. Once the wires are disconnected, you can remove the fixture from the ceiling.
- Prepare the wiring. Once the old light fixture is removed, you will need to prepare the wiring for the new fixture. To do this, first strip about 1/2 inch of insulation from the ends of the wires. Then, twist the exposed wires together and secure them with a wire nut. Finally, wrap the wire nut with electrical tape.
- Mount the fixture to the ceiling. Take the new light fixture and hold it up to the ceiling. Align the holes in the fixture with the holes in the ceiling. Then, insert the screws into the holes and tighten them until the fixture is secure.
- Connect the wires. Take the wires that you prepared in step 2 and connect them to the wires on the light fixture. The black wire should be connected to the black wire, the white wire should be connected to the white wire, and the ground wire should be connected to the green or bare copper wire. Secure the wires with wire nuts and then wrap the wire nuts with electrical tape.
- Install the diffuser or shade. The final step is to install the diffuser or shade on the light fixture. To do this, simply snap the diffuser or shade into place. Once the diffuser or shade is in place, turn on the power to the circuit and test the light fixture to make sure that it is working properly.

How To Install Flush And Semi Mount Lighting The Home

Mounting Light Fixtures Fine Homebuilding

How To Install Flush And Semi Mount Lighting The Home

Replacing Flush Mount Light With Pendant

How To Install Flush Mount Ceiling Lights Diy Guide Eyely

The Most Popular Flush Mount Lighting Styles To Know Ledmyplace

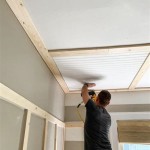
Pantry Lighting Plus Adapting A Flush Mount Light For Slanted Ceiling Addicted 2 Decorating

What Do You Need To Know About Flush Mount Lighting Ledmyplace

How To Install A Semi Flush Mount Ceiling Light

Pantry Lighting Plus Adapting A Flush Mount Light For Slanted Ceiling Addicted 2 Decorating