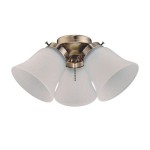
Installing a Ceiling Fan on an Angled Ceiling
Installing a ceiling fan on an angled ceiling can be a more complex task than installing one on a flat ceiling, but it is still possible to do it yourself with the right tools and materials. Here are the steps involved in installing a ceiling fan on an angled ceiling:
1.
Gather your materials.
You will need the following materials to install a ceiling fan on an angled ceiling: * Ceiling fan * Ceiling fan mounting bracket * Angled ceiling adapter * Electrical wire * Wire nuts * Screwdriver * Drill * Level2.
Choose the right location for your ceiling fan.
The ideal location for a ceiling fan is in the center of the room, but you may need to adjust the location slightly to avoid any obstacles, such as light fixtures or beams. Once you have chosen the location, mark the spot on the ceiling with a pencil.3.
Install the ceiling fan mounting bracket.
The ceiling fan mounting bracket is a metal bracket that attaches to the ceiling and supports the ceiling fan. To install the mounting bracket, first locate the electrical wires in the ceiling. Once you have located the electrical wires, use a screwdriver to remove the electrical box cover. Then, use a drill to make pilot holes for the mounting bracket screws. Finally, insert the mounting bracket screws into the pilot holes and tighten them until the mounting bracket is secure.4.
Install the angled ceiling adapter.
The angled ceiling adapter is a metal bracket that attaches to the ceiling fan mounting bracket and allows the ceiling fan to be installed on an angled ceiling. To install the angled ceiling adapter, first loosen the screws that hold the ceiling fan mounting bracket to the ceiling. Then, slide the angled ceiling adapter over the ceiling fan mounting bracket and tighten the screws.5.
Connect the electrical wires.
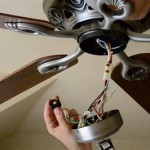
Once the ceiling fan mounting bracket and the angled ceiling adapter are installed, you can connect the electrical wires. To do this, first strip the ends of the electrical wires about 1/2 inch. Then, twist the bare ends of the wires together and secure them with wire nuts. Finally, tuck the wires into the electrical box and replace the electrical box cover.6.
Install the ceiling fan.
Once the electrical wires are connected, you can install the ceiling fan. To do this, first lift the ceiling fan onto the angled ceiling adapter. Then, insert the screws that came with the ceiling fan into the holes in the angled ceiling adapter and tighten them until the ceiling fan is secure.7.
Test the ceiling fan.
Once the ceiling fan is installed, turn it on to make sure it is working properly. If the ceiling fan is not working properly, check the electrical connections to make sure they are secure. You may also need to adjust the angle of the ceiling fan blades to ensure that they are spinning smoothly.Installing a ceiling fan on an angled ceiling can be a challenging task, but it is possible to do it yourself with the right tools and materials. By following these steps, you can safely and easily install a ceiling fan on your angled ceiling.

How To Install A Ceiling Fan On Sloped Lemon Thistle

How To Install A Ceiling Fan On Sloped Lemon Thistle

Fans On An Angle Installing Ceiling Angled Or Raked

How To Choose A Ceiling Fan For Vaulted Ceilings Lightology

How To Find Ceiling Fans Slope Adapters And Downrods For Angled Ceilings Delmarfans Com

How To Choose A Ceiling Fan For Vaulted Ceilings Lightology

Hunter Fans How To Install Your Ceiling Fan Cpo Outlets

Ceiling Fans For Angled Ceilings Fansonline

How To Choose A Ceiling Fan For Vaulted Ceilings Lightology

How To Install A Ceiling Fan On Sloped Lemon Thistle
See Also

