Installing Tongue and Groove on Ceiling
Installing tongue and groove on a ceiling can be a rewarding project that can add character and warmth to any room. Here's a step-by-step guide on how to do it:
1. Prepare the Ceiling
First, you need to prepare the ceiling by removing any existing paint, wallpaper, or paneling. Ensure the ceiling surface is smooth and free of any imperfections.
2. Install Blocking
To support the tongue and groove planks, you need to install blocking perpendicular to the joists. The blocking should be spaced no more than 16 inches apart.
3. Decide on Pattern
Determine the pattern you want to use for the tongue and groove planks. You can choose from various patterns, such as herringbone, straight run, or staggered.
4. Nail the First Plank
Start by nailing the first plank at one corner of the ceiling. Ensure it's level and flush with the wall.
5. Install Subsequent Planks
Continue installing the planks, one by one, alternating between the tongue and groove sides. Gently tap the planks into place, ensuring they fit snugly.
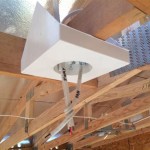
6. Cut Around Obstacles
When you encounter obstacles like light fixtures or pipes, you need to cut the planks around them. Measure and cut the planks carefully to ensure a precise fit.
7. Nail the Planks
Nail each plank securely into the blocking using galvanized nails. Countersink the nails slightly below the surface of the wood.
8. Fill Nail Holes
Once the planks are all in place, fill the nail holes with wood filler. Use a putty knife to smooth the filler and let it dry.
9. Sand the Surface
Once the filler is dry, sand the surface of the ceiling to remove any rough edges or imperfections.
10. Apply Finish
Finally, apply your desired finish to the ceiling. You can use paint, stain, or a clear sealant to protect the wood and enhance its appearance.
Here are some additional tips for installing tongue and groove on a ceiling:
- Use a nail gun for faster and more consistent nailing.
- Pre-drill holes for the nails to prevent splitting the wood.
- If the ceiling is very high, you may need to use a scaffold or ladder for safety.
- Allow the planks to acclimate to the room's temperature and humidity for a few days before installing them.
Installing tongue and groove on a ceiling is an achievable project with careful planning and execution. By following these steps and tips, you can create a beautiful and durable ceiling that will enhance the look of your home for years to come.

Diy Tongue And Groove Ceiling Wood Planks Jenna Sue Design

Shiplap Ceiling How To Install A Tongue And Groove Diy

How To Install Tongue And Groove Ceilings Youtube

Installing A T G Ceiling By Yourself Stonehaven Life

Shiplap Ceiling How To Install A Tongue And Groove Diy

How To Install Tongue And Groove Ceilings

How To Install A Tongue Groove Cedar Plank Ceiling

Shiplap Ceiling How To Install A Tongue And Groove Diy

Installing A Tongue And Groove Porch Ceiling Homemade By Huseman

How To Install Tongue Groove Board