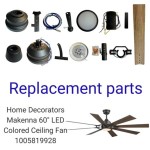
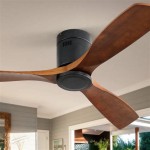
Replace Ceiling Fan Pull Switch
Ceiling fans are ubiquitous in many homes, providing a convenient way to circulate air and keep rooms cool. While ceiling fans are generally reliable appliances, their pull switches can malfunction over time, leading to frustration and inconvenience. Fortunately, replacing a ceiling fan pull switch is a relatively straightforward task that can be completed in a matter of minutes with the right tools and materials.
Materials and Tools You'll Need:
- Replacement ceiling fan pull switch
- Screwdriver (Phillips head or flat head, depending on the switch type)
- Electrical tape
- Wire strippers (optional)
Safety First!
Before you begin any electrical work, it's crucial to ensure your safety. Turn off the power to the ceiling fan at the circuit breaker or fuse box. This will prevent the risk of electrical shock while you're working.
Step-by-Step Instructions:
- Remove the Switch Cover: Locate the pull switch on the ceiling fan and gently pull it straight down to detach it from the switch housing.
- Disconnect the Wires: Inside the switch housing, you'll see two wires connected to the switch. Loosen the screws holding the wires in place and carefully disconnect them. It's a good idea to note which wire was connected to which terminal for easy reassembly.
- Remove the Old Switch: Once the wires are disconnected, unscrew the switch from the housing. Note the orientation of the switch so you can install the new one correctly.
- Prepare the New Switch: Remove the mounting screws from the new pull switch. Strip about 1/2 inch of insulation from the ends of the wires using wire strippers or a sharp knife.
- Connect the Wires: Insert the stripped wires into the corresponding terminals on the new switch. Tighten the screws to secure the wires in place. Ensure the wires are fully inserted and the connections are tight.
- Install the New Switch: Align the new switch with the housing and insert the mounting screws. Tighten the screws until the switch is secure.
- Reattach the Switch Cover: Slide the switch cover back onto the switch housing until it clicks into place.
- Restore Power: Return to the circuit breaker or fuse box and turn the power back on to the ceiling fan.
- Test the Switch: Pull the switch to test if it's working correctly. The fan should respond accordingly (off, low, medium, high, or any other settings your switch may have).
Additional Tips:
- If the wires are damaged or frayed, don't attempt to repair them yourself. Call a qualified electrician for assistance.
- If you're not comfortable working with electrical components, it's advisable to hire a licensed electrician to replace the switch.
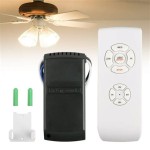
- Consider replacing the switch with a remote control or wall-mounted switch for added convenience.
Replacing a ceiling fan pull switch is a relatively simple task that can be completed in a short amount of time. By following the steps outlined above, you can restore your ceiling fan to full functionality and enjoy a comfortable and well-ventilated space.

Ceiling Fan Pull Switch Broken Chain Replace Fix Hampton Bay

Ceiling Fan Pull Chain Switch Replacement Ifixit Repair Guide

Ceiling Fan Pull Chain Switch Replacement How To Replace A On Easy

4 Ways To Replace A Ceiling Fan Pull Chain Switch Wikihow

How To Fix Replace A Ceiling Fan Pull Chain Switch

4 Ways To Replace A Ceiling Fan Pull Chain Switch Wikihow

Ceiling Fan Pull Chain Switch Replacement Ifixit Repair Guide

4 Ways To Replace A Ceiling Fan Pull Chain Switch Wikihow

How To Replace Fan Light Pull Chain Switch

Ceiling Fan Pull Chain Switch Replacement Ifixit Repair Guide